Grout Joint Width Calculator — Joint Size & Depth Guide
Joint width is the one input that changes three things at once: how the finished field reads, how much tolerance hides the tile maker's edge variation, and how many litres of grout the field drinks. This grout joint width calculator computes the exact joint volume for your tile side, joint width and tile thickness, matches your selection against the width band the format calls for, and shows the weight in dry kilograms, pounds and 10 lb bags. The grout calculator on the homepage turns those litres into bags for your brand; this page decides the geometry first.
Joint Width & Depth Planner
Width in → litres, weight and band out.Grout volume
Dry weight
2.9
kg at 1.6 kg/L
Dry weight
6.4
lb mixed dry
Bags
1
× 10 lb, rounded up
Your 1/8" joint sits outside the 3/16–1/4" band for this format — widen or narrow, or confirm against the tile maker's data sheet before you commit.
Why this band
Non-rectified (cushioned or pressed) edges vary in size and squareness; 3/16–1/4 in hides that variation so the grid reads straight.
s = tile side, g = joint width, d = thickness, all in mm. Divide by 10.7639 for litres per ft².
Volume estimates assume fully filled joints and square modules. Add about 10% for clean-up loss, deeply raked profiles and the grout that never leaves the bucket.
The joint-width comparison matrix
Six formats, one arithmetic. Every litre figure below comes from the same formula the calculator uses — depth × (2·s·g + g²) ÷ (s + g)² in millimetres — evaluated at each format's typical joint and body thickness. The minimum column is what the edge tolerance can carry; the exterior-safe column is what movement and weathering demand. Where the two disagree, the wider number wins.
| Tile format (× thickness) | Typical joint | Minimum acceptable | Exterior-safe | Grout L / 100 ft² | Best practice |
|---|---|---|---|---|---|
| 2 × 2 in mosaic × 1/4" | 1/8" (3.2 mm) | 1/16" rect. / 1/8" std | 1/4" | 6.7 L | Skim-coat the back — combed ridges ooze up and steal joint depth |
| 6 × 6 in wall × 1/4" | 3/16" (4.8 mm) | 1/8" rect. / 3/16" std | 1/4" | 3.5 L | Non-rectified bodies: hold 3/16 in so size variation stays inside the line |
| 8 × 8 in floor × 3/8" | 3/16" (4.8 mm) | 1/8" rect. / 3/16" std | 1/4" | 4.0 L | Flatness first: hold the slab to 1/4 in over 10 ft before narrowing |
| 12 × 12 in × 3/8" | 1/8" (3.2 mm) | 1/16" rect. / 3/16" std | 3/8" | 1.8 L | Anchor geometry — the cheapest format to grout at any width |
| 12 × 24 in plank × 3/8" | 3/16" (4.8 mm) | 1/8" rect. / 3/16" std | 3/8" | 2.0 L | Long edges telegraph: stay at 3/16 in or wider unless the bed is truly flat |
| 24 × 24 in large format × 1/2" | 1/4" (6.4 mm) | 3/16" | 3/8–1/2" | 2.4 L | Wide joints absorb module movement — pair with a tight EJ grid |
Read the litres column
The 2 × 2 mosaic row drinks 6.7 L per 100 ft² while the 12 × 12 row needs 1.8 L — 3.7× more for the same floor area, purely because small modules multiply joint length. Format, not width, is the dominant variable in mosaic work.
Read the two width columns
Minimum acceptable is an edge-tolerance number; exterior-safe is a movement number. On the 24 × 24 row they diverge by a full width step — 3/16 in minimum against 3/8–1/2 in outside — and the exterior value always governs outdoors.
Extreme values
Push the mosaic row from its 1/8 in typical to a 1/2 in joint and the same 100 ft² holds about 21 L — 3.1× the row figure, on a format most installers assume is cheap to grout. Unspecified mosaic width is a budget hazard for exactly this reason: the litres column reacts to width steps harder as formats get smaller.
One corner case the matrix cannot show: size-lot variation. Two boxes of the same non-rectified tile from different production lots can differ by more than the minimum column assumes, and the joint is where the mismatch surfaces. Dry-lay a square metre from every lot before committing to the narrow end of any band — if the grid wanders on the floor, it will wander worse under grout.
Footnote on the plank row: its 2.0 L figure uses the rectangular extension of the formula — depth × g × (L + W + g) ÷ ((L + g)(W + g)) — because the long joints are shared between courses. The square-tile version would overstate it at 2.7 L — nearly a third more, from one wrong assumption about which edges are shared.
Width rules that actually bind
Joint width looks like an aesthetic dial; it is mostly a tolerance budget. Five rules govern the decision in practice, and they stack in a fixed order — movement and environment first, edge tolerance second, appearance last.
Rule 1 — Rectified edges earn narrow joints
Rectified tile is cut or ground to size after firing, so adjacent pieces match within fractions of a millimetre. That is the only condition under which a 1/16–1/8 in joint stays even across a whole field. Keep it to interiors on a substrate flat within about 1/4 in over 10 ft, and treat 1/8 in as the default rather than 1/16 in whenever the run is longer than a single room.
Rule 2 — Non-rectified tile buys tolerance
Pressed and cushioned-edge bodies vary in size and squareness coming out of the kiln, typically by more than a rectified line ever will. A 3/16–1/4 in joint gives that variation somewhere to hide: each piece centers in its module and the grid still reads straight. Forcing 1/8 in onto a non-rectified floor turns the joint into a ruler that measures the factory, not the installer.
Rule 3 — Narrow joints telegraph lippage
The joint exposes the height difference between neighbouring tiles at the shoulder of the channel. Narrow the joint and the same height step fills a larger share of the visible band, so it reads as a hard edge instead of a plane change. Before committing to a narrow joint, verify flatness with a straightedge and plan levelling clips on modules 12 in and larger — the joint cannot fix what the bed caused.
Rule 4 — Movement joints are a separate width
Following ANSI/TCNA EJ171 conventions, perimeter and field movement joints are sized and spaced independently of the grout joints between tiles: field joints every 20–25 ft in interior work, tightened to every 8–12 ft outdoors, over substrates that move, and wherever the field abuts restraining surfaces. Soft sealant fills them, never rigid grout — a wide aesthetic field joint is not a substitute for a movement joint in the right place.
Rule 5 — Exterior and wet areas push widths up
Freeze-thaw cycling, thermal swing and substrate moisture movement all act across the joint, so exterior slabs call for 3/8–1/2 in field joints and the tighter movement-joint spacing of Rule 4. Wet interiors sit between the extremes: show pans and pool decks reward the upper half of the interior band, and any submerged application defaults to the exterior band. The calculator above applies this automatically when you switch the location toggle — watch the band change before the volume does.
Joint depth = tile thickness
Grout fills the full joint channel, and the channel is exactly as deep as the tile is thick — from the finished face down to the tile bed. There is no separate "grout depth" input on a real site: a 1/4 in mosaic gives the grout 1/4 in of channel, a 1/2 in porcelain slab gives it 1/2 in. Any voids under the tile subtract from that depth without appearing on any drawing, which is why back-buttering large format pieces matters — it fills the hollow spots so the measured depth and the real depth agree.
Volume growth per width step — 12 × 12 × 3/8 in at 100 ft²
The bar chart is the tipping-point picture: the first width step from 1/16 in to 1/8 in doubles the volume, the step to 1/4 in nearly doubles it again, and by 3/8 in the field holds 5.7× the baseline. Depth moves the same needle one-for-one — swapping a 3/8 in body for a 1/2 in body at any fixed width multiplies the volume by 1.33, the ratio of the two thicknesses. Width and depth multiply each other, which is why the calculator refuses to treat them as separate questions.
The failure mode at the extreme end is invisible on paper: a 24 × 24 in body laid over a spot of unfilled mortar carries a hollow that subtracts from the nominal depth without changing any drawing. Across a field of large modules those hollows add up, which is why the real-world consumption on big-format jobs often lands above the formula even when every input was entered correctly — back-buttering is the fix, and it costs one extra pass of the trowel.
Tile thickness and mortar bed thickness in the grout calculation
A long-tail query deserves a straight answer: mortar bed thickness does not change grout quantity. The bed lives below the tile; the grout lives in the channel above it. Raise the bed and the whole assembly rises — tile face, joint shoulder and all — while the joint depth stays locked to the tile thickness. A 3/8 in bed and a 3/4 in bed under the same 3/8 in body consume identical grout. That said, the bed reaches the grout math through two side doors.
Side door 1 — an uneven bed widens the joints you need
Thin-set applied inconsistently embeds tiles at different depths, and the installer compensates the only way a joint allows: wider. A bed that wanders from 1/4 in to 1/2 in across a room will push a would-be 1/8 in layout toward 3/16 in or beyond, and every width step carries its volume multiplier with it. Flatness work on the bed is therefore grout-budget work — the two quantities are linked through the width decision, not through the volume formula.
Side door 2 — combed ridges steal mosaic joint depth
Under a 2 × 2 mosaic, the standard 1/4 in trowel leaves ridges roughly as tall as the tiles are deep. Press the sheet in and those ridges have nowhere to go except up into the joints, displacing grout before it is ever placed. The remedy costs nothing: skim-coat the flattened bed or back-butter each sheet so the channel depth on paper survives contact with the bed. Without it, a nominally full 1/4 in depth grouts like a partially filled one and the coverage chart quietly lies.
Tip
Size the trowel to the tile, then flatten with the flat side before combing on large format: a flattened bed keeps embedding depth uniform, which is what lets a narrow joint stay narrow from wall to wall.
Warning
Past 3/8 in on interior work, every extra linear foot of joint is shrinkage-crack exposure you paid for: the volume multiplier crosses 5× the 1/16 in baseline at 3/8 in and keeps climbing to 7.5× at 1/2 in, while the cure profile of a deep, wide joint gets riskier, not safer.
Don't
Don't pick joint width to fix lippage that comes from an uneven bed. The lippage is still there — wider joints just spread it across a wider band. Flatten the substrate or back-butter instead; the joint is a tolerance consumer, never a tolerance creator.
How to calculate tile and joints before grouting
The calculator automates five steps you can run on paper. The only trick is counting the joint line once, for both directions, instead of guessing a percentage.
Measure the area
Length × width in ft². Split L-shaped rooms and sum the pieces — joints don't average.
Count the joint line
2000 ÷ (tile side + joint width), both in mm, gives joint metres per square metre for both directions.
Multiply width × depth
A 1 m run of joint w mm wide and d mm deep holds w × d millilitres. Multiply by the metres from step 2.
Convert to dry weight
Litres × 1.6 = kg of dry grout; × 2.205 = pounds. Add ~10% for waste before the last step.
Round up to bags
Divide pounds by the bag size (10 lb here) and round up. Never round down — partial bags don't exist.
Worked example: 150 ft² floor, 8 × 8 × 3/8 in tile, 3/16 in joints
Side s = 203.2 mm · joint g = 4.8 mm · depth d = 9.5 mm · area = 13.9 m²
Joint line
9.6 m/m²
2000 ÷ (203.2 + 4.8)
Volume
≈ 6.1 L
9.6 × 4.8 × 9.5 ÷ 1000 × 13.9
Dry weight
21 lb
6.1 L × 1.6 × 2.205, +10% → 23 lb
Buy
3 × 10 lb bags
two bags fall 3 lb short
Cross-check with the exact per-square-metre formula and the same geometry evaluates to 6.0 L — the quick joint-count runs about 1% high, which is a free waste margin rather than an error. If the quick method and the calculator ever disagree by more than a bag, recheck the tile side in millimetres; an inch-mix-up there is the only mistake that scales with the whole job.
The waste percentage itself decays with job size: bucket-set grout and clean-up loss are roughly a fixed quantity per mixing session, around a quarter litre, so on a 100 ft² floor needing 1.8 L that fixed loss is close to 15% of the total, while on a 1000 ft² slab needing 18 L it falls under 2%. Small jobs deserve the full 10% margin; large jobs can run the arithmetic bare and still round up safe.
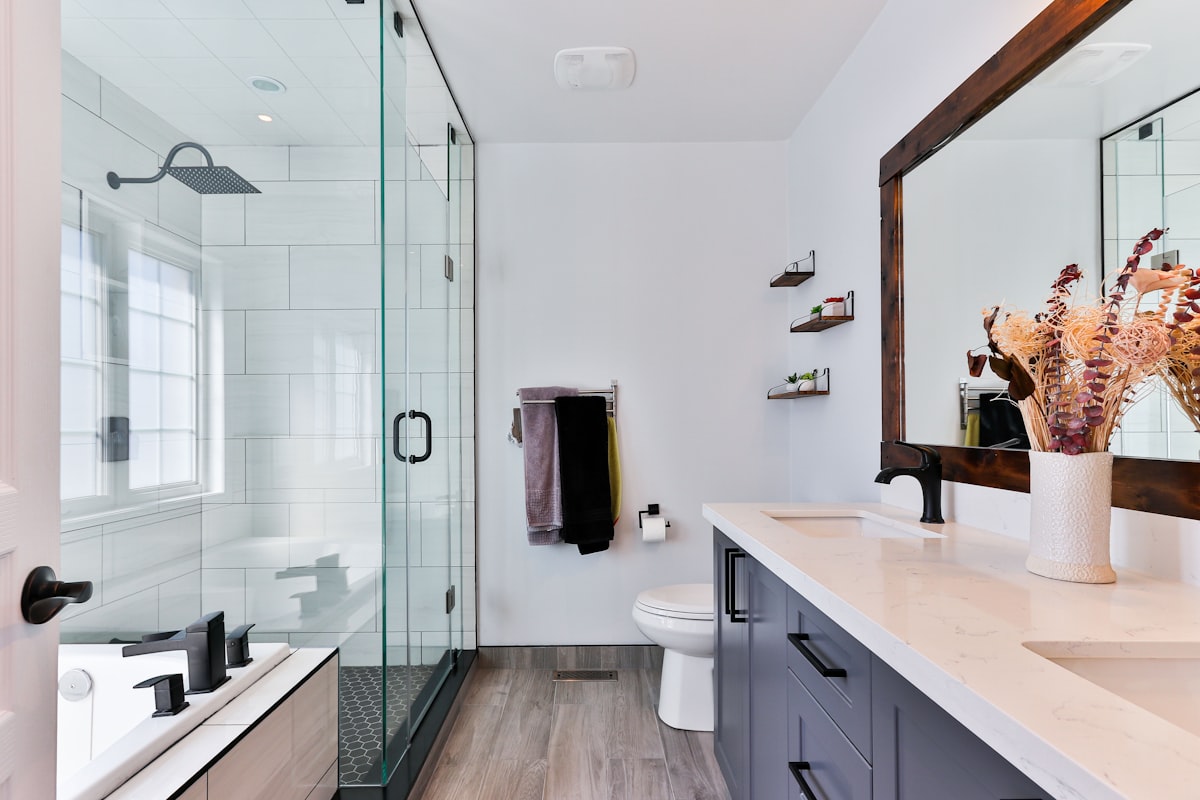 Same floor, different widths — the joint line is the only variable the installer fully controlsPhoto: Unsplash
Grout joint width FAQ
What width should grout joints be for 12×24 tile?
Start at 3/16 in (4.8 mm) for interior floors and step up to 1/4–3/8 in outdoors. The long edge of a plank amplifies whatever the substrate gives it, so a 1/16 in joint over a non-rectified plank will trace every dip as visible lippage. If the plank is genuinely rectified and the floor holds flatness near 1/8 in over 10 ft, 1/8 in works on interior walls. At 3/16 in joints and 3/8 in thickness the format consumes about 2.0 L of grout per 100 ft² — computed with the rectangular version of the joint formula, because the long joints are shared between courses.
Does joint width change how much grout I need?
Yes, and faster than most estimates assume. On 12 × 12 × 3/8 in tile across 100 ft², 1/16 in joints hold 0.91 L of grout; 1/8 in doubles that to 1.82 L; 1/4 in reaches 3.57 L (3.9× the baseline); 3/8 in hits 5.28 L (5.7×); and 1/2 in peaks at 6.94 L (7.5×). The growth is steeper than linear because each width step widens the channel and the corners between four tiles widen with it. The multiplier crosses 5× at 3/8 in — the point where a wide-joint aesthetic starts costing real material per hundred square feet.
Does tile thickness affect the grout calculation?
Directly and linearly, because joint depth equals tile thickness — the grout fills the channel from the tile face down to the substrate. On 12 × 12 in tile at 1/8 in joints, a 1/4 in thick body needs 1.21 L per 100 ft², a 3/8 in body needs 1.82 L, and a 1/2 in body needs 2.42 L: double the thickness, exactly double the volume. This is why the thickness selector sits next to the width selector in the calculator above, and why mosaic on thin bodies can still demand large quantities — small tiles multiply the joint length even when the depth is shallow.
Does mortar bed thickness change grout quantity?
No. Mortar bed thickness sets the height of the assembly below the tile; grout occupies only the joint channel, whose depth equals the tile thickness regardless of what is underneath. A 3/8 in bed and a 3/4 in bed under the same 3/8 in tile need the same grout. Where the bed does reach the grout math is indirectly: an uneven bed produces uneven embedding and lippage, which pushes installers toward wider joints, and combed ridges left under mosaics ooze into the joints and displace grout, so the nominal depth shrinks even though the geometry on paper has not changed.
What is the minimum grout joint width for rectified tile?
1/16 in (1.6 mm) is the practical floor for rectified tile up to 12 in on a flat interior substrate, and 1/8 in is the safer default on floors. Rectified edges are machine-cut after firing to tight size tolerance, which is what allows narrow joints to stay even. Going below 1/16 in leaves no room for the size lot variation that remains even on rectified bodies, and narrow joints on heated floors or exterior work contradict the movement band — exterior assemblies want 3/8–1/2 in regardless of how precise the edge is. Match the narrowest joint to the flattest substrate, not to the showroom photo.
How do I calculate tile and joints before grouting?
Five steps. First, measure the area in square feet. Second, count the joint line: 2000 ÷ (tile side + joint width), both in millimetres, gives joint metres per square metre for both directions. Third, multiply joint length × width × depth — a one-metre run of joint w mm wide and d mm deep holds w × d millilitres. Fourth, convert litres of joint to dry weight at roughly 1.6 kg per litre, or 2.2 lb per kg. Fifth, add about 10% for waste and round up to whole bags. For 150 ft² of 8 × 8 × 3/8 in tile at 3/16 in joints that chain produces about 6.1 L, or 21 lb dry — three 10 lb bags.
Why do narrow joints show lippage more?
A grout joint has no levelling power — it simply exposes the height difference between adjacent tile edges at the shoulder of the channel. At a 1/16 in joint, a 0.5 mm height step occupies about a third of the visible band, so the eye reads a hard edge. The same step inside a 3/8 in joint is spread across a much wider band and reads as a gentle plane change instead. Industry flatness conventions pair with this: substrates held near 1/4 in over 10 ft, plus levelling clips on large modules, are what make narrow joints possible. Widen the joint when flatness cannot be fixed — never the reverse.
From joint width to bag count
Once the width and depth are settled, the grout calculator converts your joint litres into dry kilograms and brand-specific bag counts in one step. Planning a mosaic field? The mosaic tile grout calculator handles the multiplied joint length that small formats create.
Every width question, one hub
Joint width pairs with brand coverage, substrate presets and epoxy volumes. The calculators hub lists every tool on the site — pick the one that matches the bag or pail you are actually buying.
Related Grout Calculators
Mapei Grout Calculator
Free Mapei grout calculator for Ultracolor Plus FA, Flexcolo...
Laticrete Grout Calculator
Free Laticrete grout calculator for Spectralock PRO, Permaco...
TEC Grout Calculator
Free TEC grout calculator for Power Grout, AccuColor and Ski...
Custom Building Products Grout Calculator
Free custom building products grout calculator for Polyblend...
Bostik Grout Calculator
Free Bostik grout calculator for TruColor premixed urethane,...
ARDEX Grout Calculator
Free ARDEX grout calculator for FL, FG 8, WA epoxy and Endur...
Davco Grout Calculator
Free Davco grout calculator for Elite G10, Davcogrout fine a...
Epoxy Grout Calculator
Free epoxy grout calculator: turn joint volume into 2-part a...
Wall, Floor & Shower Grout Calculator
Free wall floor shower grout calculator with surface presets...
Tile Adhesive & Grout Calculator
One takeoff for the whole install: tile count, thinset bags ...
Grout Cost Calculator
Free grout cost calculator: bags × price = material budget. ...
Grout Sealer Calculator
Free grout sealer calculator: convert grout line length into...
Mosaic Tile Grout Calculator
Free mosaic tile grout calculator for penny rounds, 2-inch h...
Grout Calculator UK & Metric
Free UK & metric grout calculator: kg/m² coverage formula wi...
LVT Grout Strip Calculator
Free LVT grout strip calculator: total grout line linear foo...
Patio Grout Calculator
Free patio grout calculator for wide-joint outdoor stone pav...
Trowel Size Calculator
Free trowel size calculator: pick tile format and surface, g...
Mortar Calculator
Free mortar calculator with three modes: thinset by notch co...
Sandbed Shower Pan Calculator
Free sandbed shower pan calculator: 4:1 Portland+sand dry pa...
Sika Grout Calculator
Free Sika grout calculator: SikaTile CEG, Flex and Epoxy til...
Quikrete CMU Grout Calculator
Free Quikrete CMU core fill grout calculator: 6×8×16 through...